
This guide describes how to configure a Node-RED MQTT publishing node for use with AWS IoT Core.
1. Add a new MQTT publishing node.
- Start Node-RED
- Drag an MQTT publishing node to the Node-RED palette.

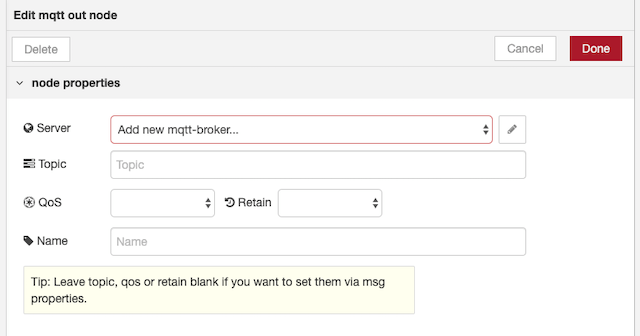
2. Configure the MQTT publishing node.
- Double-click the node to open the configuration window.
- Select ‘Add new mqtt-broker’ in the Server dropdown and then click the pencil icon.
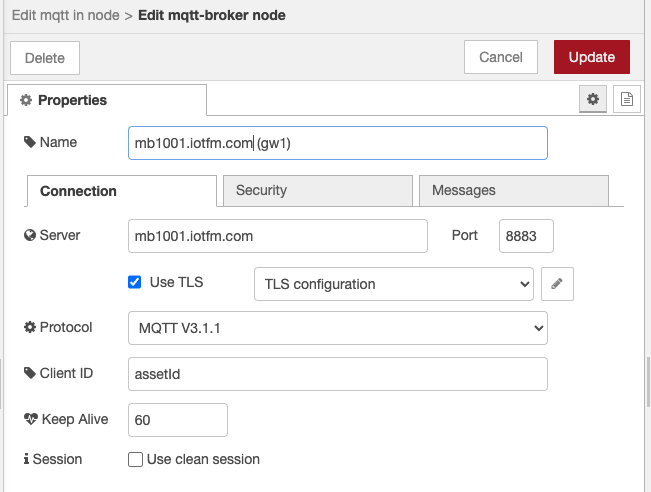
3. Add a new broker configuration.
- Enter a name in the Name input.
- Enter the message broker address in the Server input.
- Enter 8883 in the Port input.
- Click the ‘Enable secure (SSL/TLS) connection’ checkbox.
- Enter the assetId value for this asset in the Client ID input.
- Uncheck the ‘Use clean session’ checkbox.
- Select ‘Add new tls-config …’ in the TLS Configuration dropdown and then click the pencil icon.
4. Add a new TLS configuration node.
- Obtain the necessary certificate files for your asset.
- Configure the node by referencing the certificate files (Step 5) or uploading the certificate files (Step 6).
- Uploading is a bit easier, but doesn’t work with all Node-RED installations.
- Please note that the certificate files will only work with a single Node-RED instance.
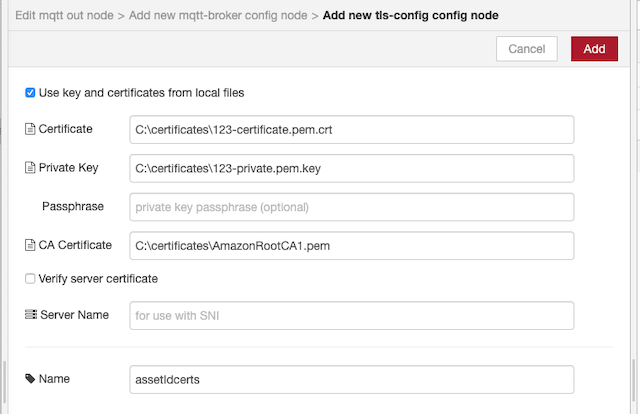
5. Add a new TLS configuration node by referencing local certificate files.
- Place the certificate files on the machine running Node-RED in a known location.
- Check the ‘Use key and certificates from local files’ checkbox.
- Enter the path to each certificate file (Certificate, Private Key and CA Certificates) in the inputs.
- Enter a name in the Name input.
- Skip to step 7.
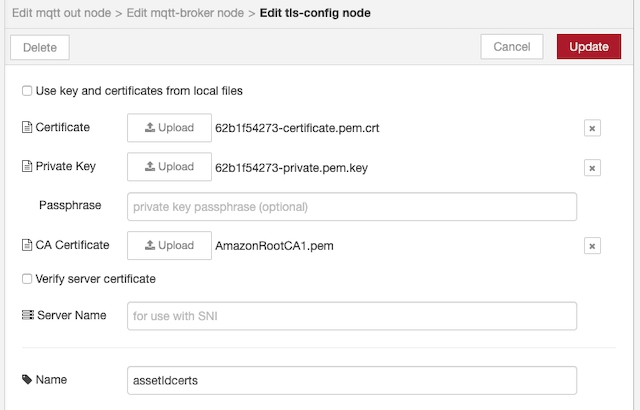
6. Add a new TLS configuration node by uploading the certificate files.
- Upload the three certificate files by clicking the three upload buttons .
- Add a name to the Name input.
- Click the Update button.
7. Update the TLS configuration node.
- Click the Update button.
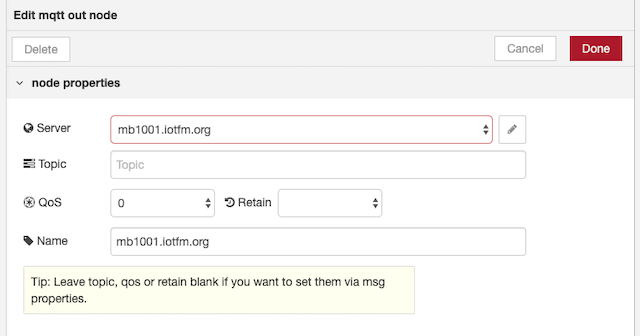
8. Update the MQTT configuration node.
- Leave the Topic input blank. (Please see note below.)
- Select 0 for the QoS input.
- Add a name to the Name input.
- Click the Done button.
9. Success.
Note
By leaving the Topic input blank, the topic can be assign by an upstream function during runtime as follows:
var topic = 'Asset/'+ global.get("assetId") + '/' + dataItemId;

return [{"topic": topic, "payload": JSON.stringify(message)}]
If the topic will not be changing during runtime, then a topic can be added to the Topic input.