
Mechanical Assembly of the Multisensor Kit
The following guide provides directions on how to mechanically construct the multisensor kit.
Task 1. Modify the Plastic NEMA Box
You’ll need:
- NEMA Box ABS, Digikey Part Number: 377-1787-ND
- Cordless drill
- 23/64″ hole saw
- 21/32″ hole saw
- Ruler
- Pen
- Deburr tool
Steps:
- Mark the hole centers per Figure 1 (hole locations within 1/8th inch are acceptable).
- Drill the holes using the hole saws.
- Deburr the holes to ensure a clean fit.
Figure 1. Modifications to NEMA Box.
Task 2. Bolt the DIN Rail to the box
You’ll need:
- Blue Loctite
- Pan Head Screws M4 x 6mm 2X
- DIN rail 130 mm long
Steps:
-
- Cut a piece of DIN Rail to approximately 130mm (comes in 1000mm sections from supplier)
- Place a drop of Loctite on the threads of the M4 bolts
- Screw the DIN rail into the threaded holes parallel to the M8 Connectors and Cable Gland
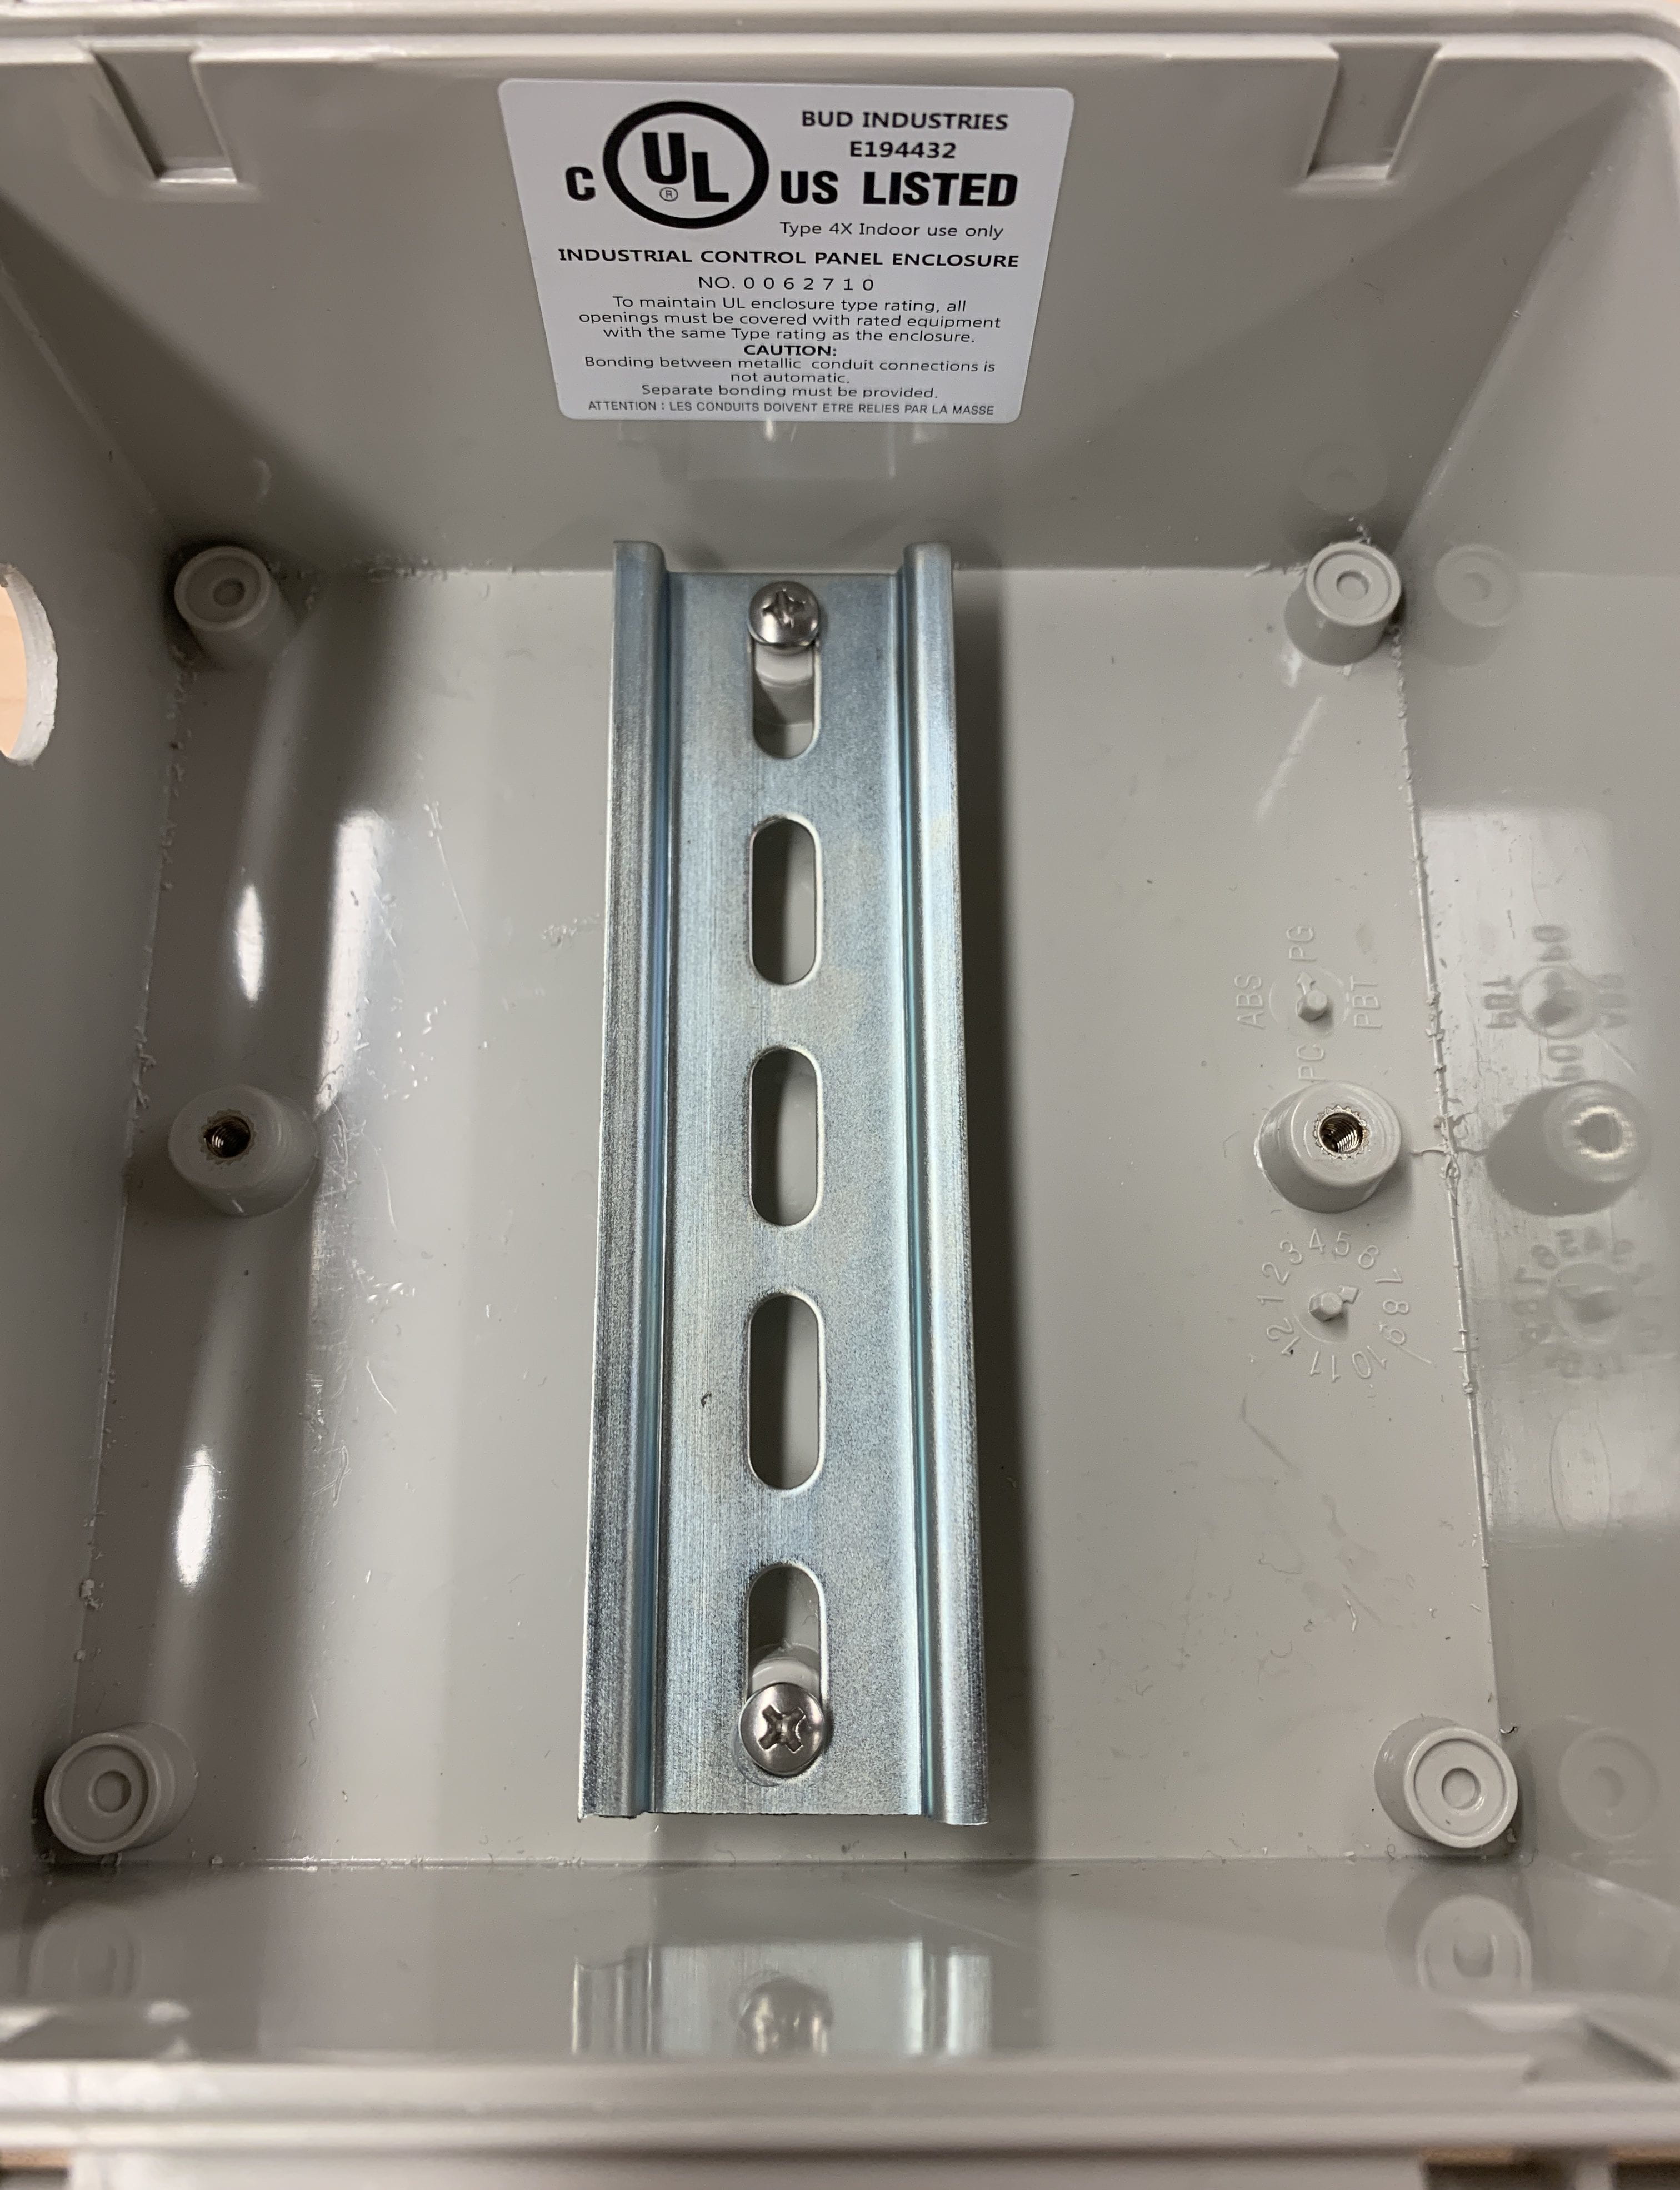
Figure 2. DIN Rail Installation
Task 3. Insert the M8 Female-to-wire connectors and Cable Gland
You’ll need:
- (5x) M8 Bulkhead Connector, female to wire. PN: A126830-ND
- Cable Gland PG9. PN: 377-1631-ND
Steps:
- Unscrew the nut on the M8 connector, insert them from the inside and torque the nut on the outside. Repeat with the other 4 holes.
- The cable gland is assembled similarly in the last and largest hole cut out.
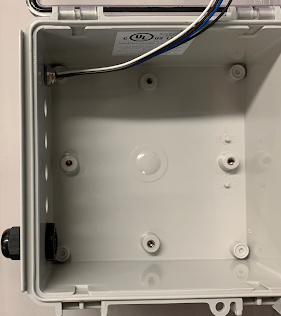
Figure 3. M8 connector and Cable Gland Install
Task 4. Assemble the Beagle Bone Black to its DIN Rail Adapter
You’ll need:
- BeagleBone Black Wireless PN: BBBWL-SC-562-ND
- (8x) Pan Head 4-40 x 1/4 bolt
- (4x) Round Standoff 4-40 x 3/8
- DIN rail plate for BBB
- (2x) Flathead 6-32 x 3/8 bolt
- (2x) 6-32 nut
- DIN Rail Clip, DINM13-RC
Steps:
- Assemble the BeagleBone Black to the DIN Rail adapter per Figure 4. (note: the BBB and DIN BBB adapter plate do not have symmetric hole locations and must be rotated correctly to assemble.)
- Teensy 3.2 K20 EVAL BRD. PN: 1528-2385-ND
- BBB Teensy Cape
- BeagleBone Black on DIN Rail Adapter from step 4
- Solder Iron
- Solder
- Solder Flux
- Solder wick or Desoldering pump
- Solder the Teensy board to the BBB Teensy Cape
- Attach the Cape to the top BeagleBone Black by aligning the pin connector
- BeagleBone Black Assembly from step 5
- Nema Box with Connectors and DIN Rail installed from Step 3
- AC/DC Converter 5v 12W. PN: 1866-2241-ND
- Attach the BeagleBone Black Assembly to the DIN Rail as shown in Figure 6
- Attach the AC/DC Converter to the DIN Rail as shown in Figure 6
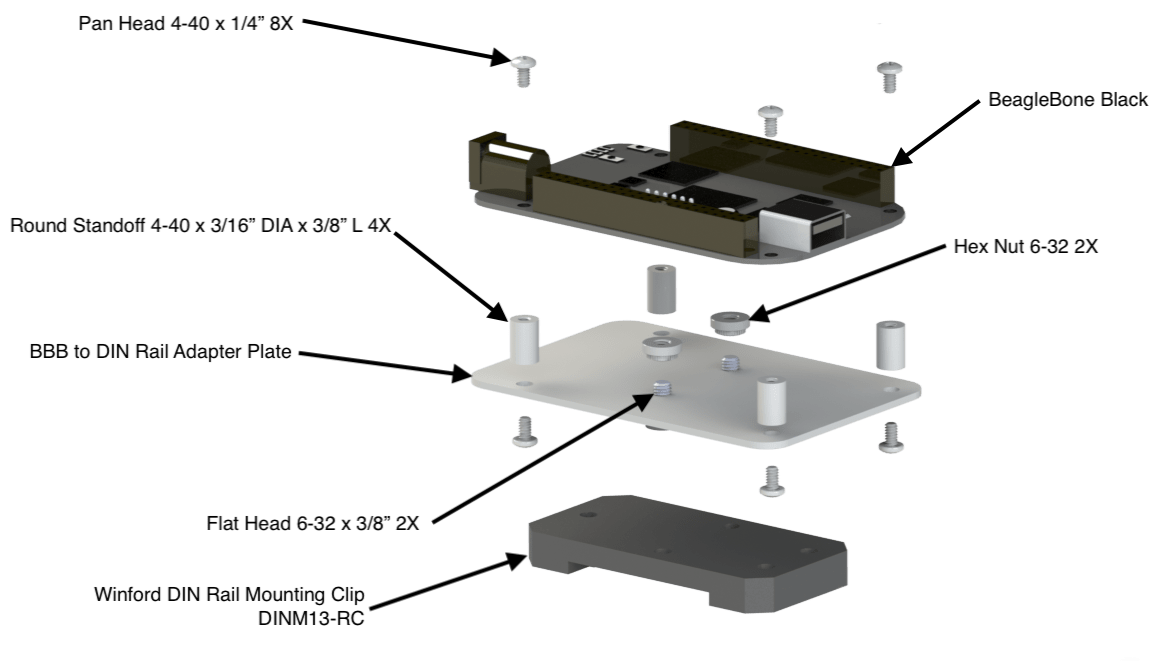
Figure 4. BeagleBone Black DIN Rail Adapter Assembly
Task 5. Solder the Teensy to the Cape and attach the Cape onto the top of the BeagleBone Black
You’ll need:
Steps:
Figure 5. Teensy Soldered to Cape and installed onto BeagleBone Black
Task 6. Affix the BeagleBone Black Assembly and Power Adapter into the Box
You’ll need:
Steps:
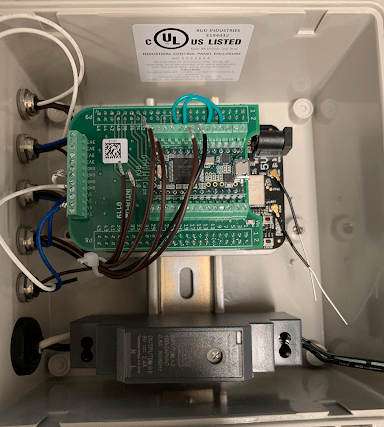
Figure 6. Power Converter and BeagleBone Black installed onto DIN Rail